Why do we need directory synchronization?
ProAuth is optimized to be used in a multi-tenant context. This is often the case if you are providing a SaaS application to your customers. In this scenario, customers do not want to manually manage their users in your application because this would mean an extra effort for them and there would be an additional process needed to setup to keep password policies and users and groups in sync. Therefore, the customers want to integrate their already existing directory with your SaaS application. This is where ProAuth with its multi-tenancy and federation capabilities comes into play.

As shown in the illustration above, we will setup a federation for each tenant. This means, that a user of customer A will be redirected to the login page of directory A and after the successful login took place, the user will be redirected back to ProAuth. The tokens will be validated, transformed and a ProAuth token will be issued. The benefit of ProAuth in between is that your application services have a single trust and dependency to ProAuth. They are independent of the customer’s directory and all the new registrations of new federations will be handled by ProAuth. Your application has a single trust and can rely on standardized claims. Furthermore, the users can be extended with application related profile entries and additional groups and group memberships can be managed centrally.
This sounds very nice, but there is a caveat for enterprise application use cases. With the federation approach, ProAuth and your application only knows about the user after a first login has been performed, not before. This means that if the customer’s directory contains 1000 users but only 50 have authenticated to your application, ProAuth only knows those 50 users. Knowing all the users is often a requirement for enterprise applications. The most common scenarios are:
- Assign application level permissions to users or groups
- Assign an entity to a specific users as owner
- Reference other users in approval flows or comments
Here is where the directory synchronization comes into play. For the above scenarios, we need to synchronize all users and groups upfront. The directory synchronization does not replace the federation. We still want to have the secrets and the user’s lifecycle management on the customer side. ProAuth implements a directory synchronization based on SCIM protocol (System for Cross-domain Identity Management) and synchronized the corresponding users and groups to ProAuth.

How does it work?
ProAuth supports to activate a SCIM endpoint for every OIDC-based IDP instance (federation configuration). This means that there is a dedicated endpoint with a proper authentication for every tenant federated endpoint in ProAuth. After activating and initializing the endpoint, the administrator gets a SCIM endpoint URL and a corresponding authentication token. With this information, a SCIM synchronization can be setup on the customer’s directory. Technically any directory supporting SCIM synchronization can be activated for directory synchronization. We support the following directories out of the box:
- Azure AD
- Active Directory with ProAuth Directory Synchronizer
Based on the directory synchronization, ProAuth knows the users upfront and creates a record for them. This means the user is present in ProAuth even if there has not been a login yet. The synchronized users can be assigned to additional group memberships, can be used for role assignments and be queried by applications. Based on the unique id, generated by the SCIM synchronization, a federated login can be matched to the already existing ProAuth user.
Sample configuration for AAD Sync
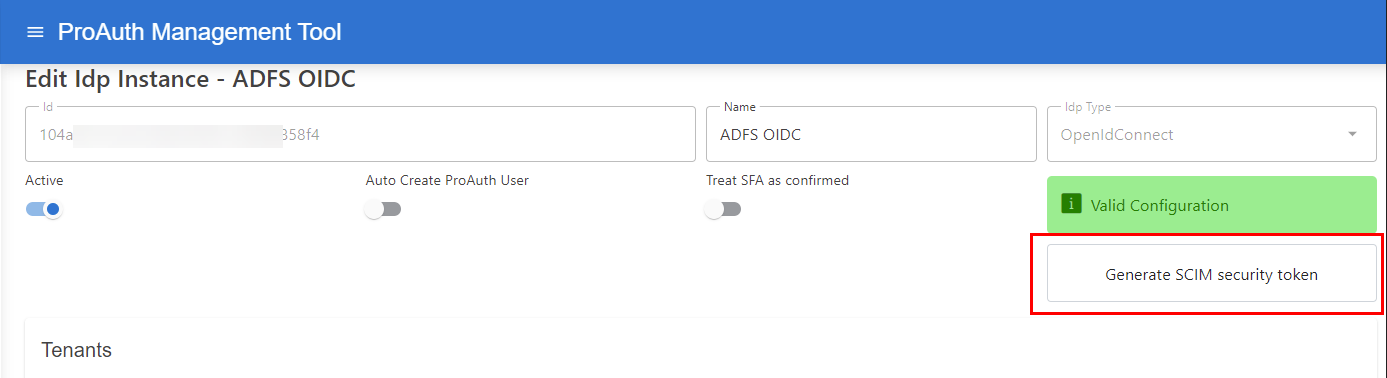
Once SCIM is enabled by activating the option ScimEnabled on the corresponding IDP instance, it’s necessary to generate a token:
It is necessary to configure the IDP to use specific claims for creating a unique key for the ProAuth user, which can be recognized properly during the login.
Set following options to calculate a unique id for the synchronized ProAuth Users:
- Search for the option
ScimUniqueIdentifierValuesand change the value to<AAD-TenantId>- Replace the value
<AAD-TenantId>with the TenantID of the ClientApp (it is also part of theAuthorityURI)
- Replace the value
- Search for the option
UniqueIdentifierClaimTypesand change the value totid,oid

Once the SCIM enabled IDP is configured, ProAuth is ready to handle SCIM API requests for that IDP.
The following values from the IDP Instance are necessary in the next steps to configure the SCIM synchronizers.
- IdpInstance Id
- ScimToken
ProAuth supports multiple SCIM endpoints, therefore the IDP Instance ID is part of the ProAuth SCIM API URL.
The default SCIM endpoint on ProAuth is:
https://<ProAuth-URI>/idpscheme/<IdpInstanceId>/scim
Configure the AAD enterprise application
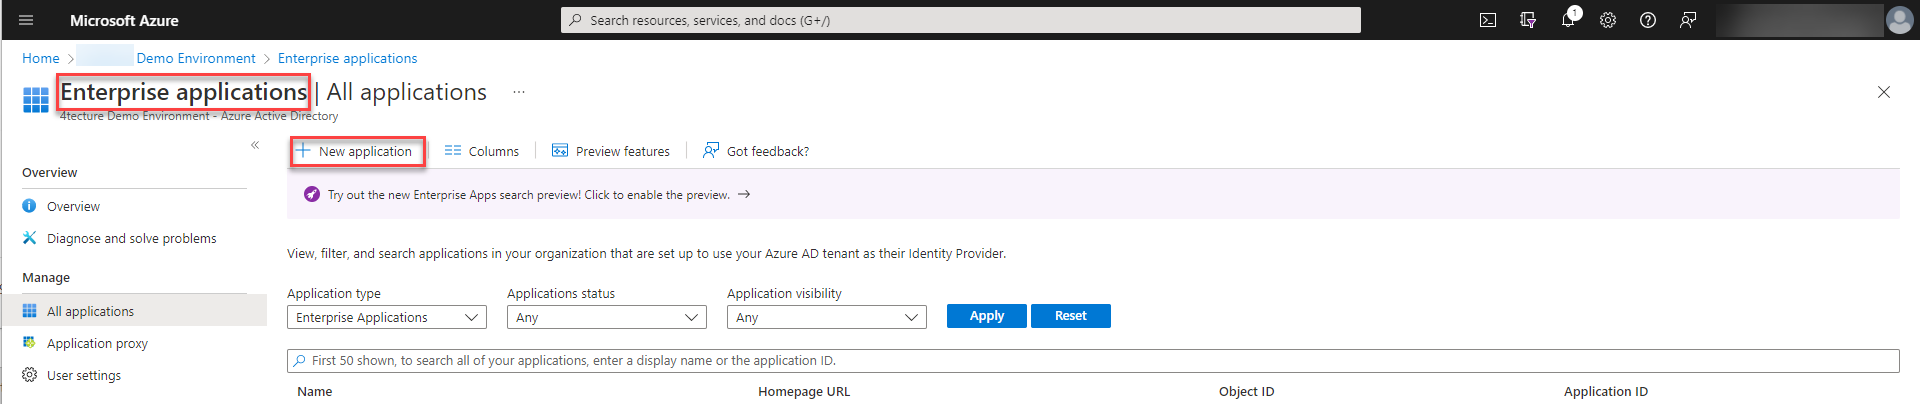
In order to setup SCIM provisioning an enterprise application has to be created within Azure Active Directory.
-
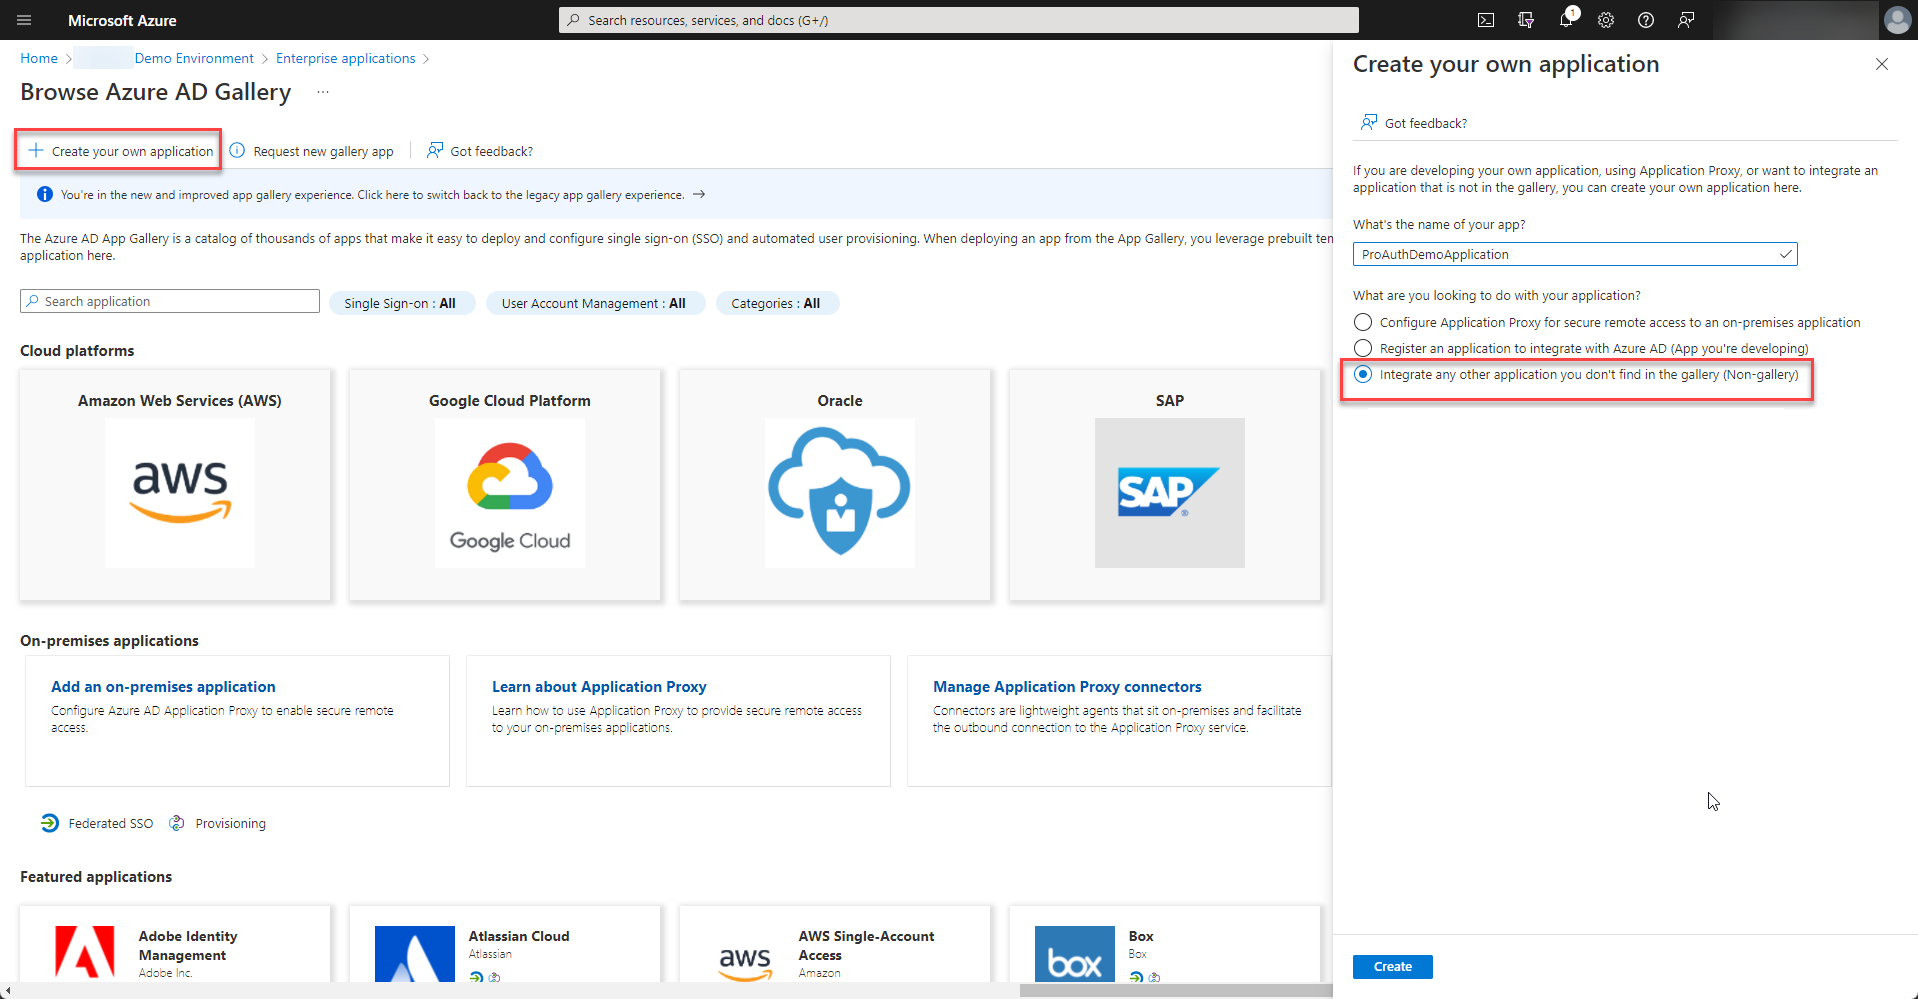
Please choose to “Create your own application” and select “Integrate any other application you don’t find in the gallery (Non-gallery)” from the options.
-
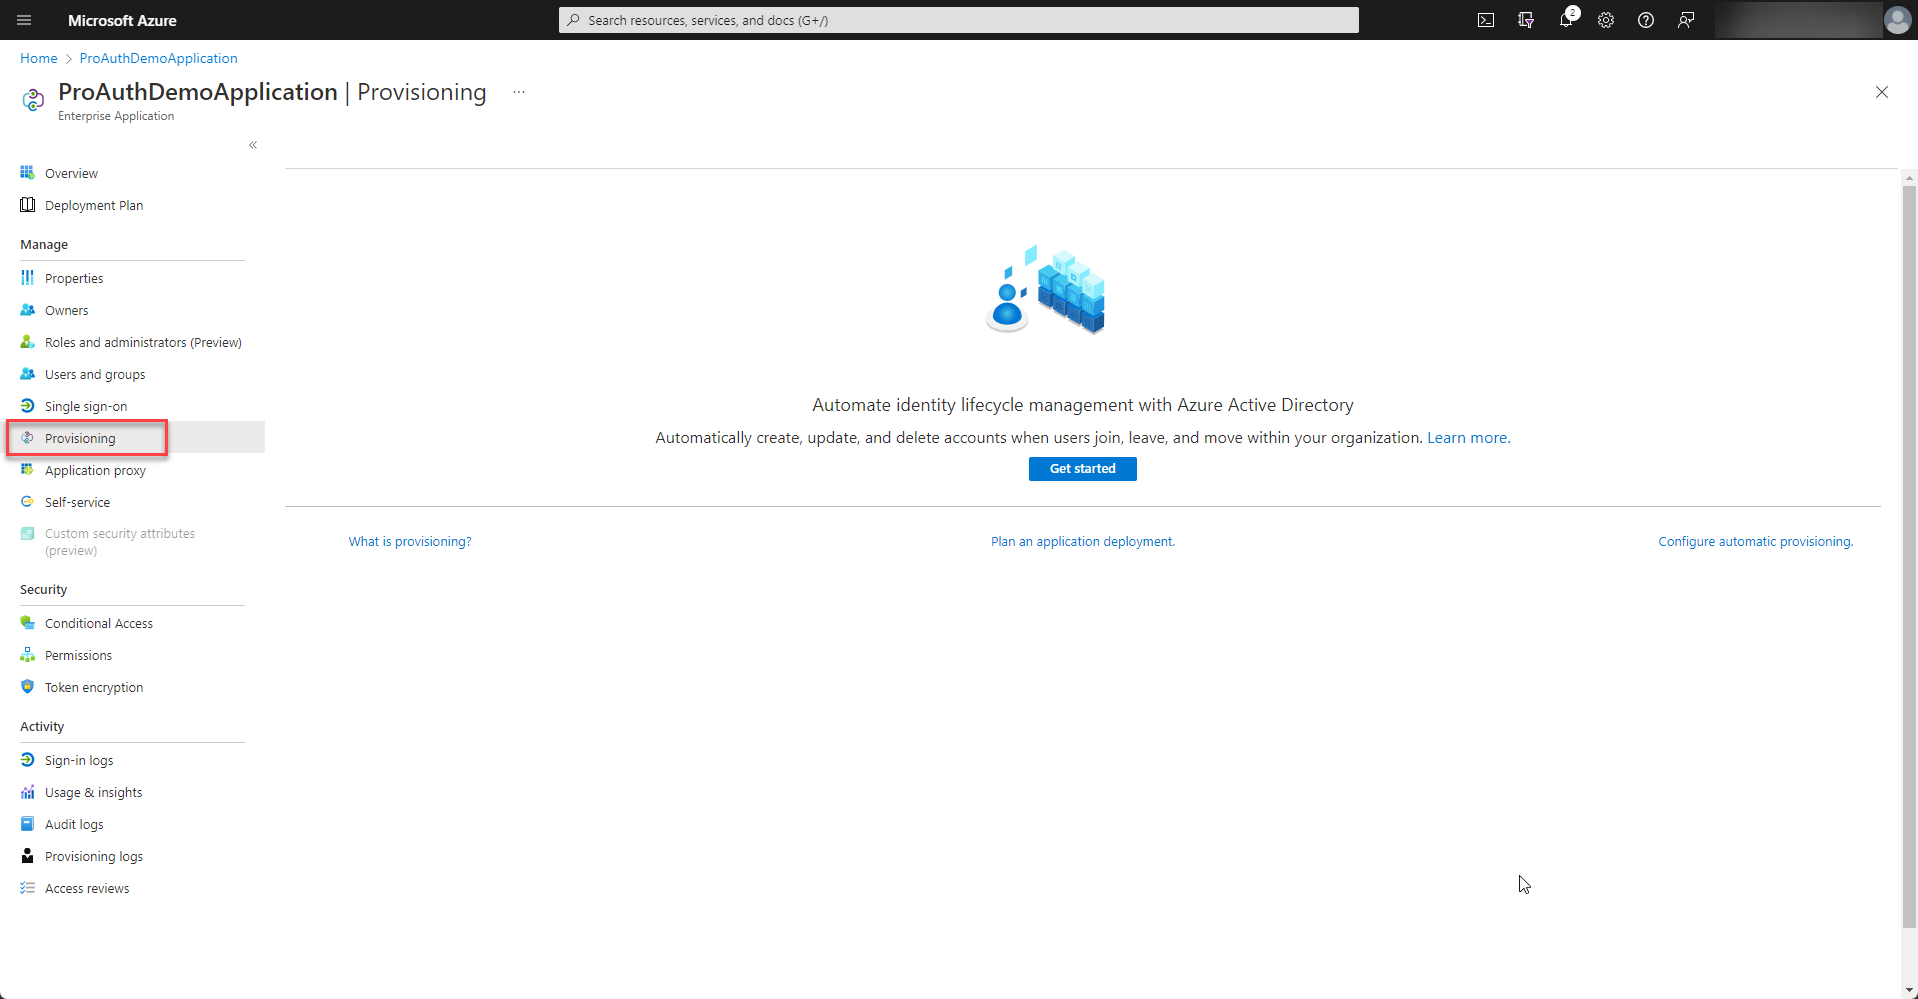
Once the enterprise application is created, please start to setup the provisioning.
-
Please fill in the Tenant URL and Secret Token from the SCIM Options of your IDP instance in ProAuth and test the connection. If everything is ok, the configuration can be saved.
-
In order to match the ids of the user correctly, the
externalidmapping needs to be customized. Therefore select to modify the mapping of the users.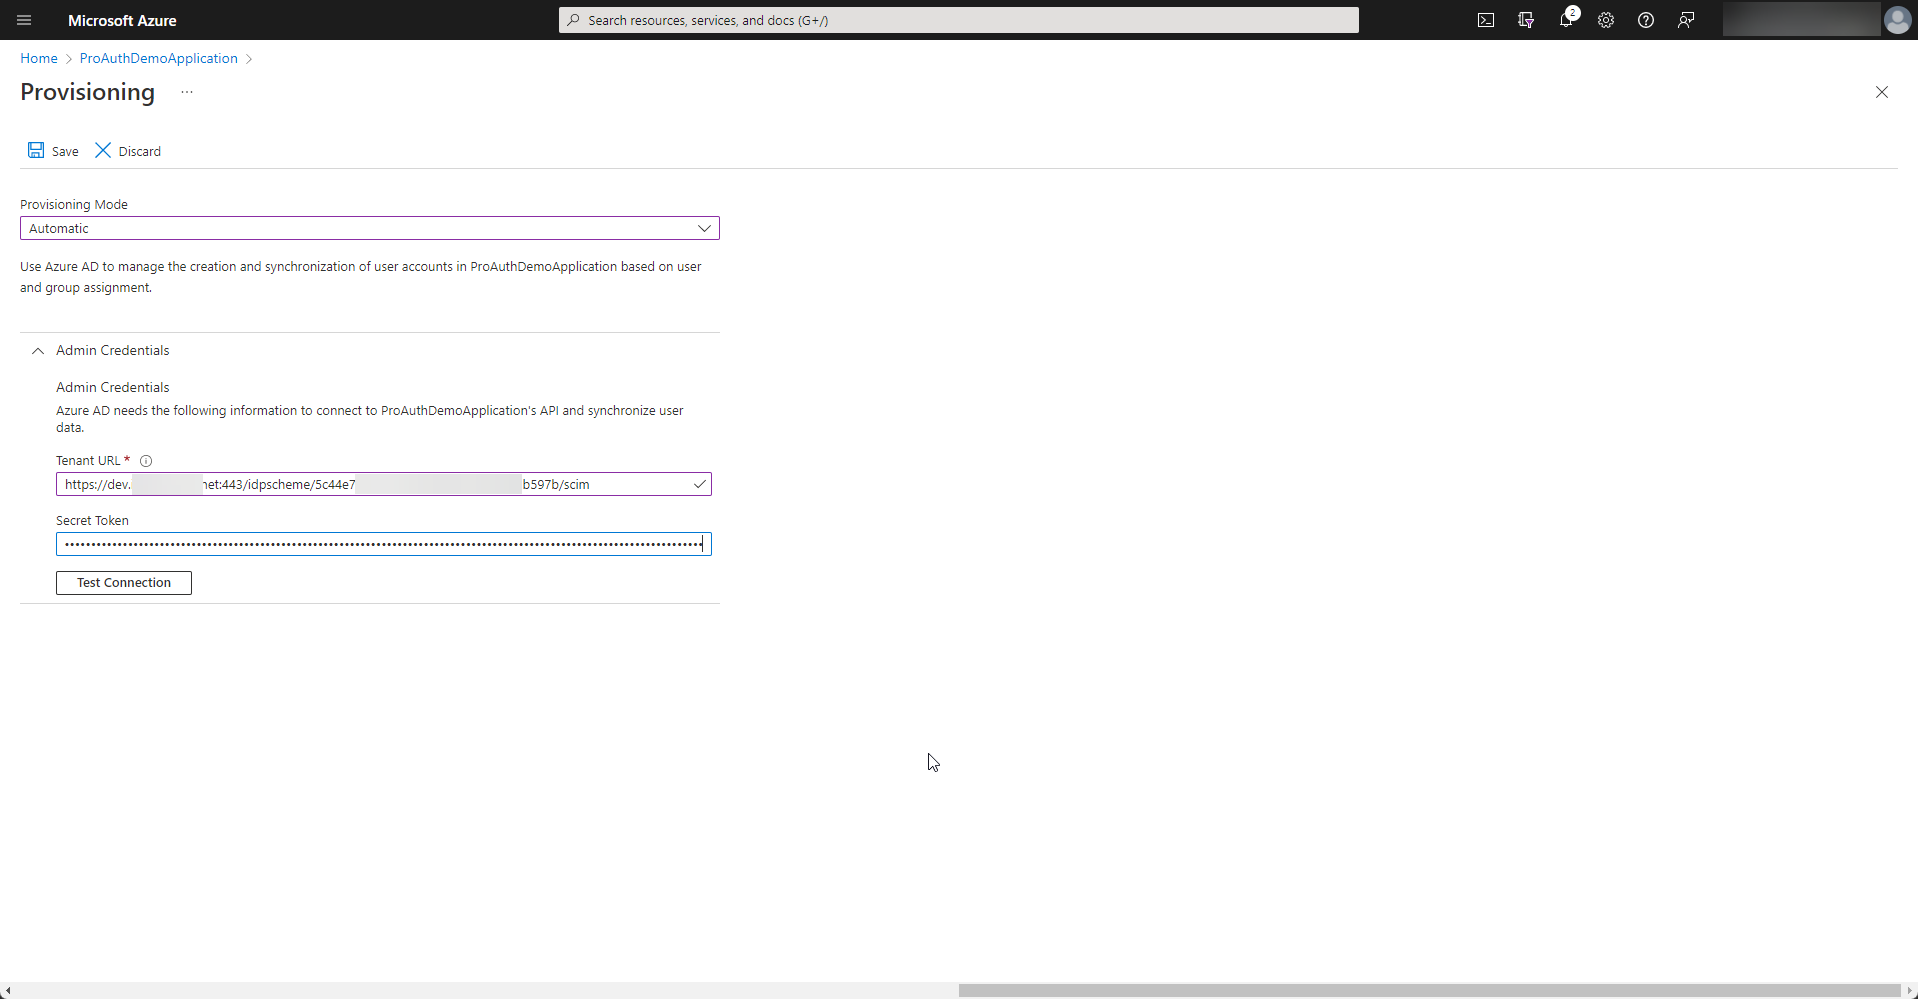
-
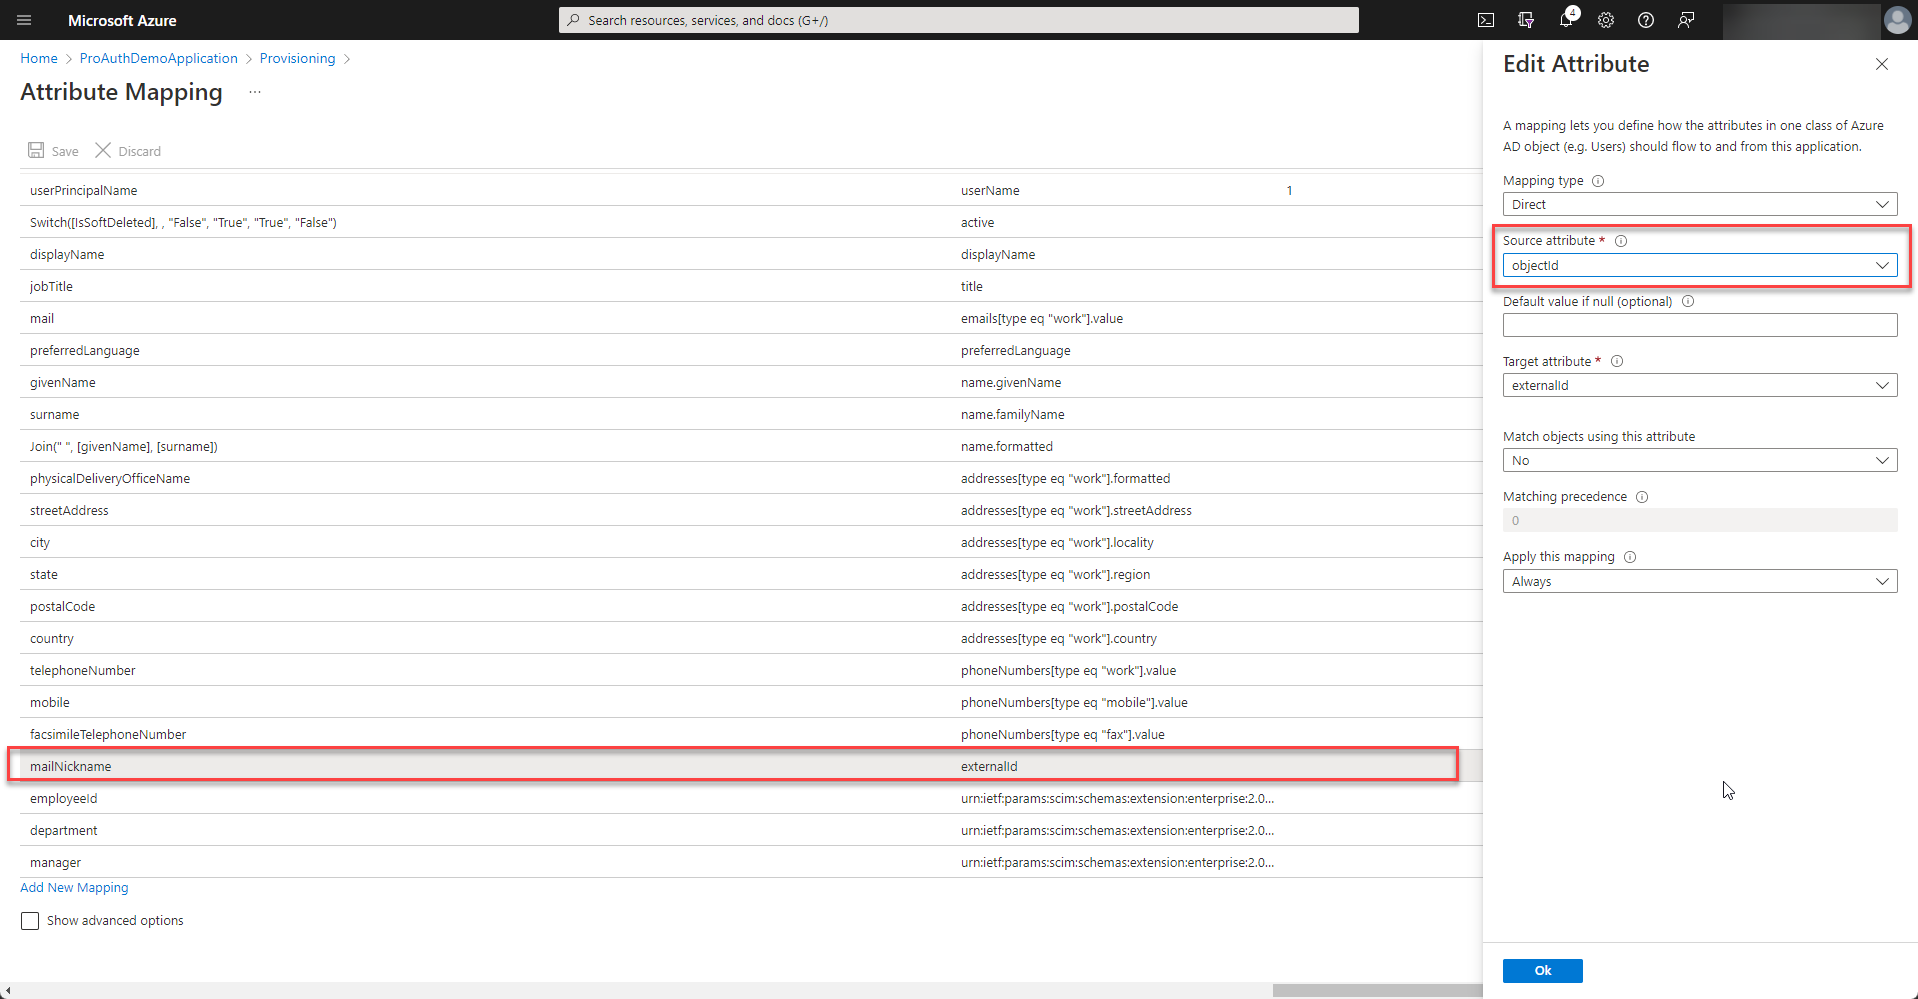
Double click the externalId mapping and change the source attribute to
objectId.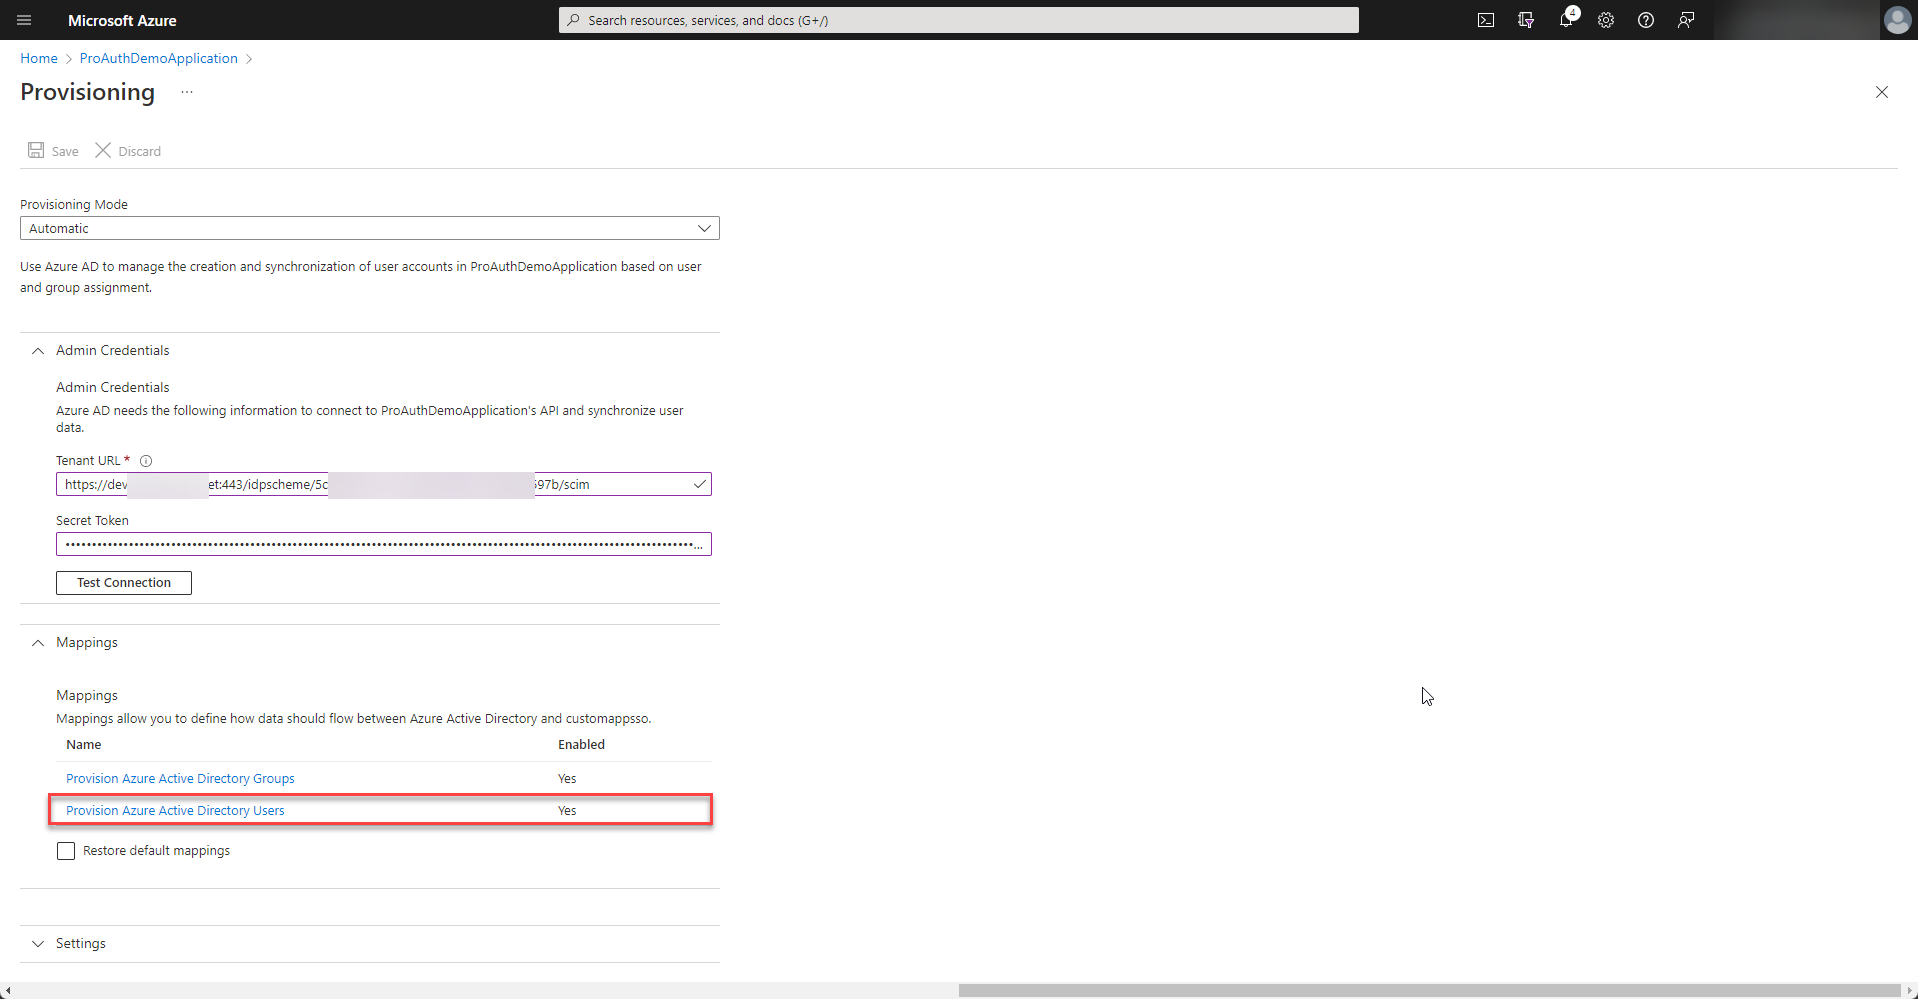
-
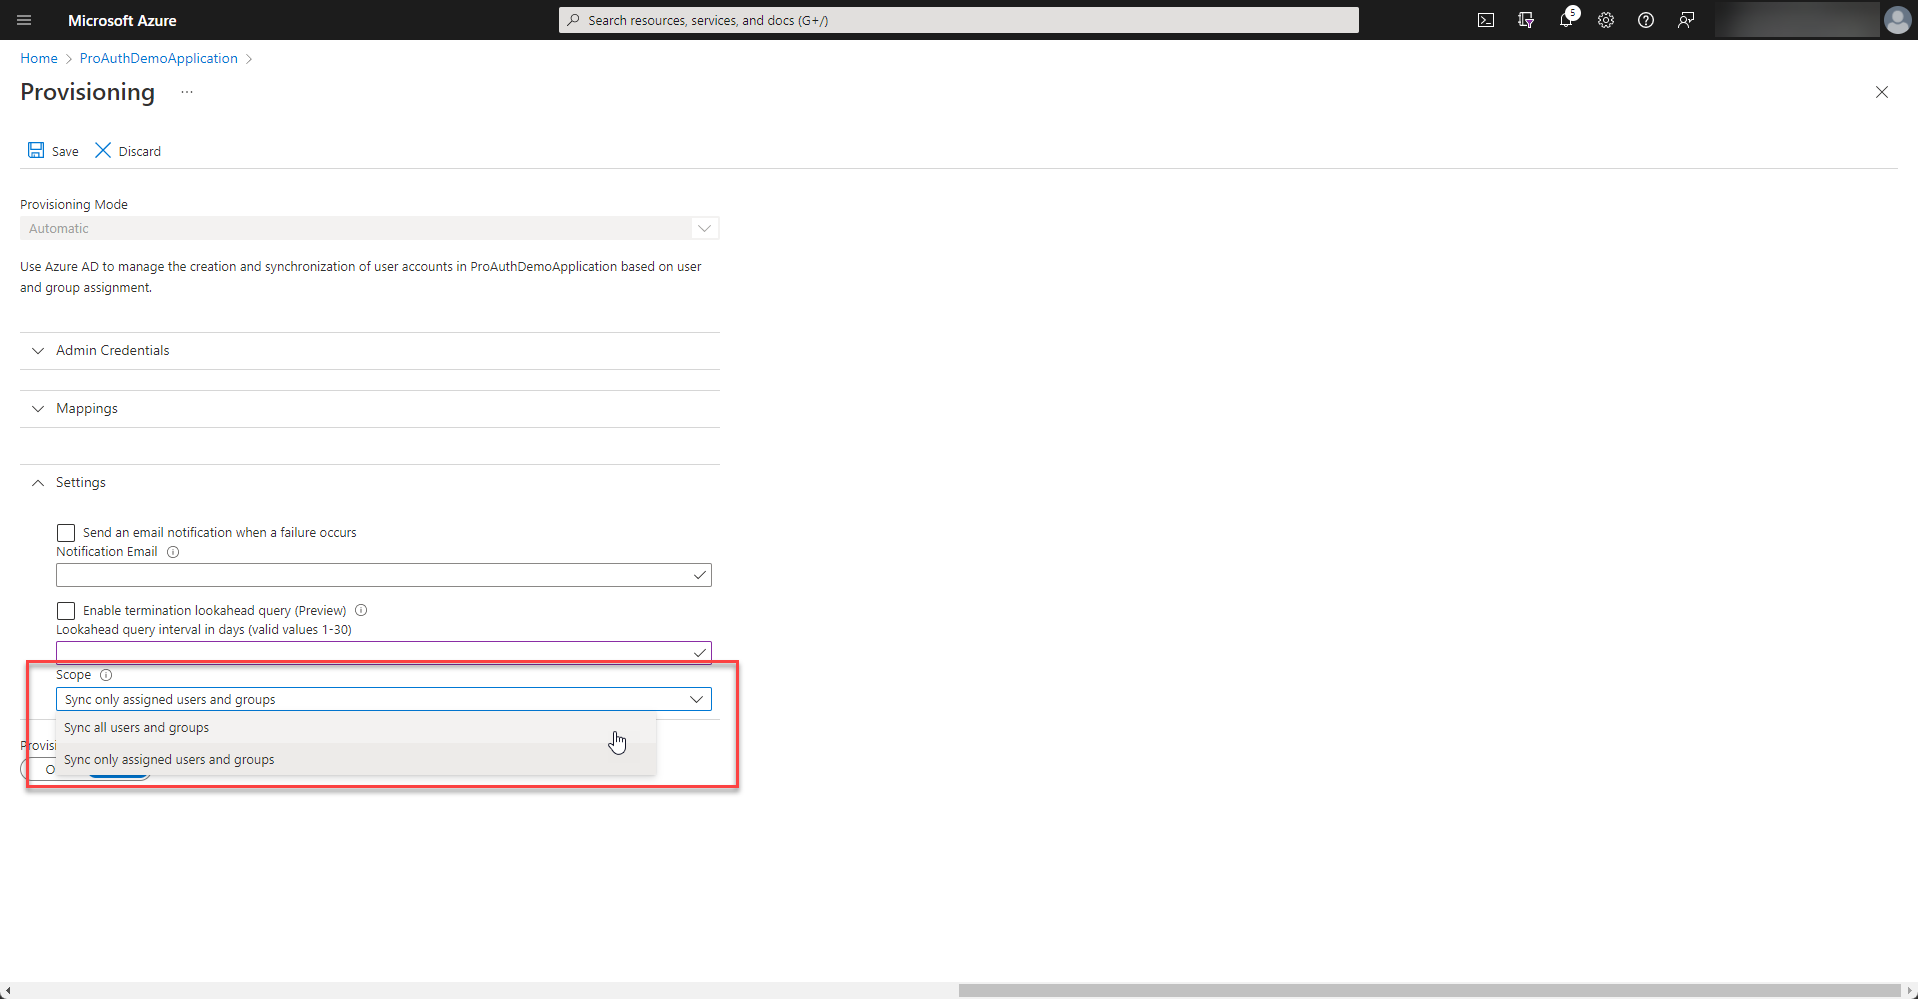
Depending on your enterprise application setup, only assigned users or all users of your directory are synchronized. If there is no assignment made, please select “Sync all users and groups”.
-
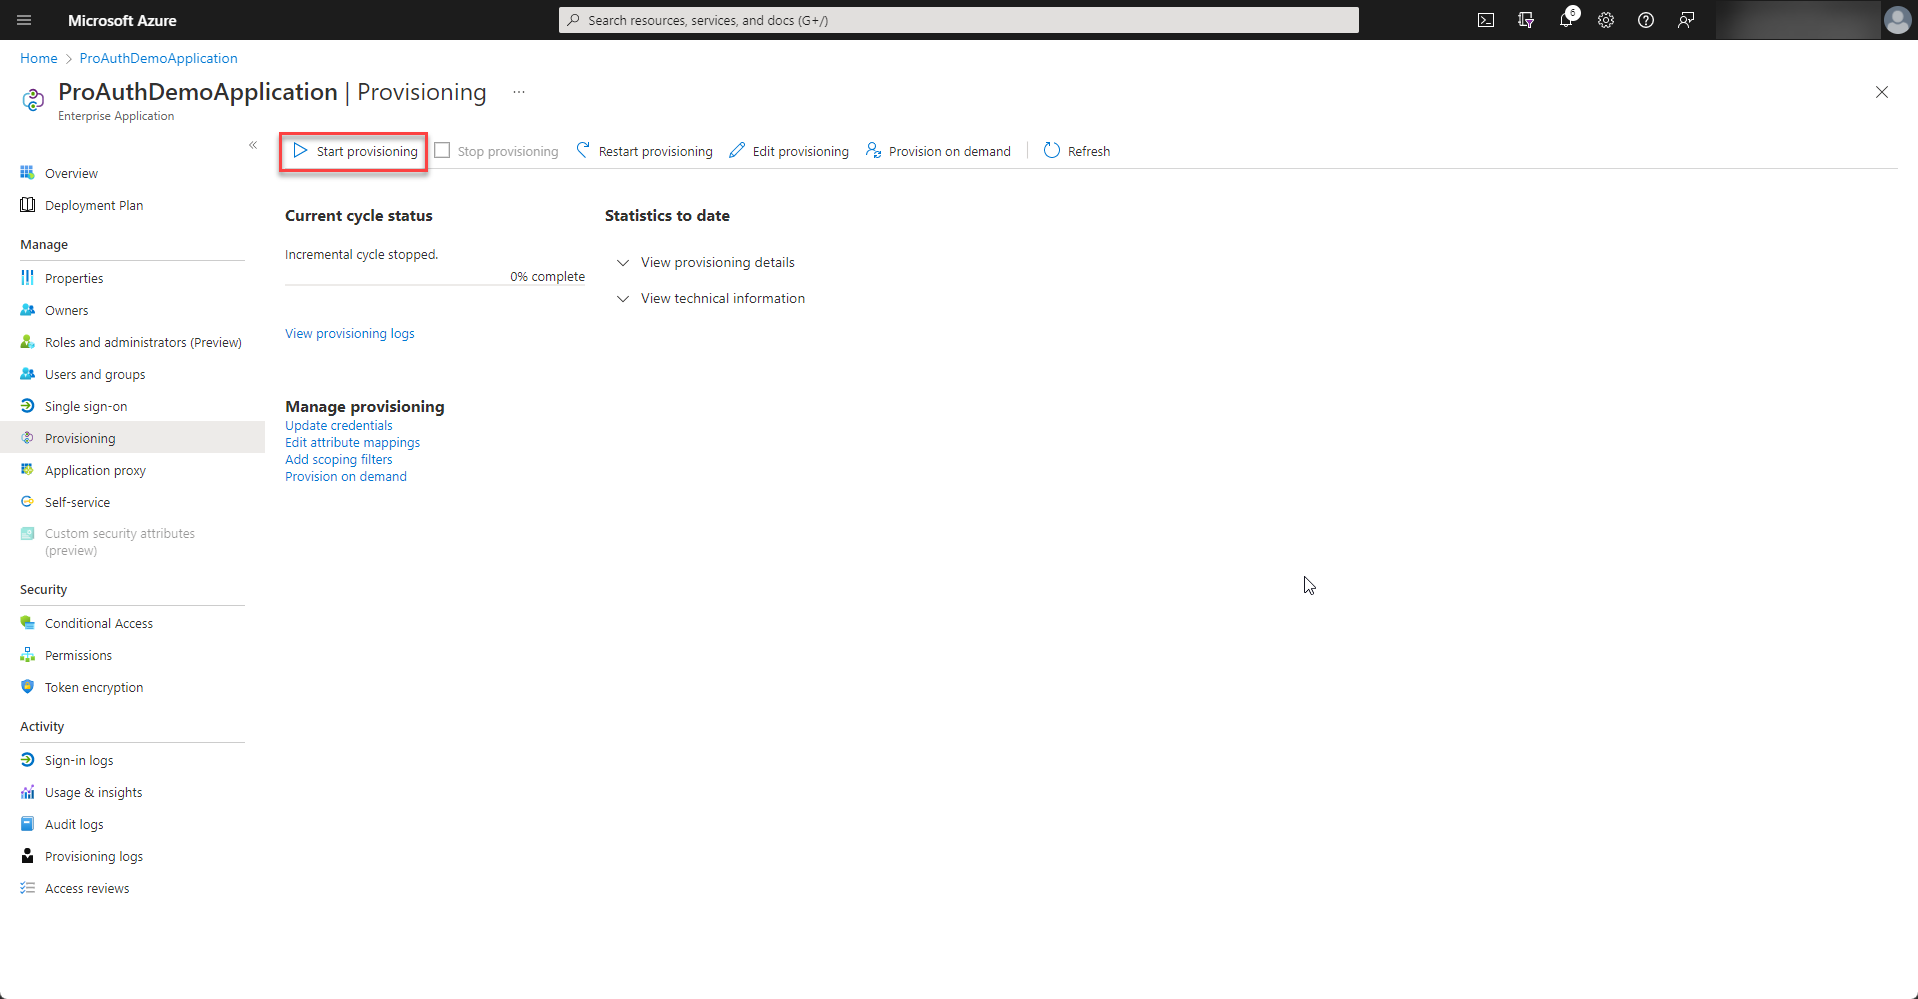
Once all the settings are in place, the provisioning can be started.
-
Azure Active Directory runs the synchronization every 40 minutes. There is a detailed log of each synchronization job and also e-mail alerts can be configured. Please review the logs of the first synchronization jobs if any error occurred.